
Choosing the Right Dermaplaning Scalpel: Blade Types Explained
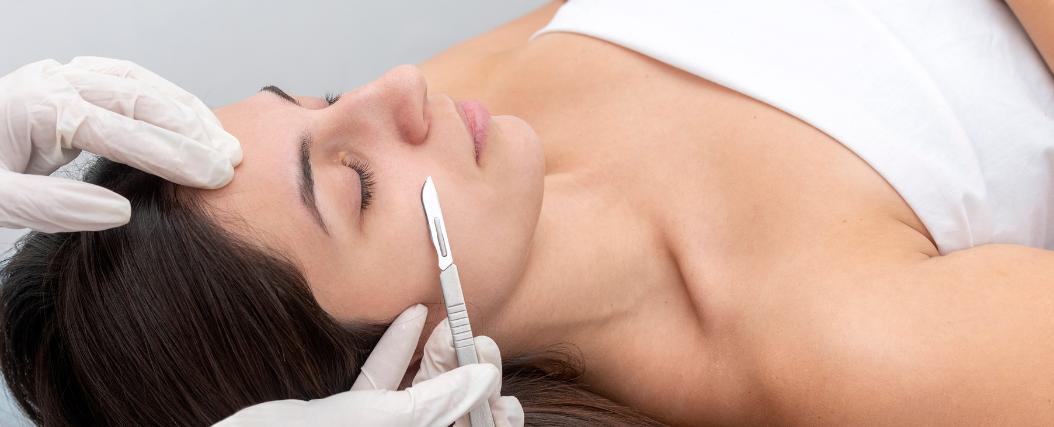
The blade you choose for dermaplaning directly impacts your results, client satisfaction, and safety. While technique matters, even the most skilled esthetician cannot overcome the limitations of an incorrectly selected blade. The right blade glides smoothly across facial contours, efficiently removes vellus hair and dead skin cells, and leaves skin glowing—without irritation or risk of nicks.
Dermaplaning has become one of the most sought-after facial treatments for good reason. This non-invasive exfoliation method removes the top layer of dead skin cells and fine facial hair, revealing brighter, smoother skin while enhancing product absorption and creating the perfect canvas for makeup application. But achieving these results safely and effectively requires understanding the tools of the trade, starting with blade selection.
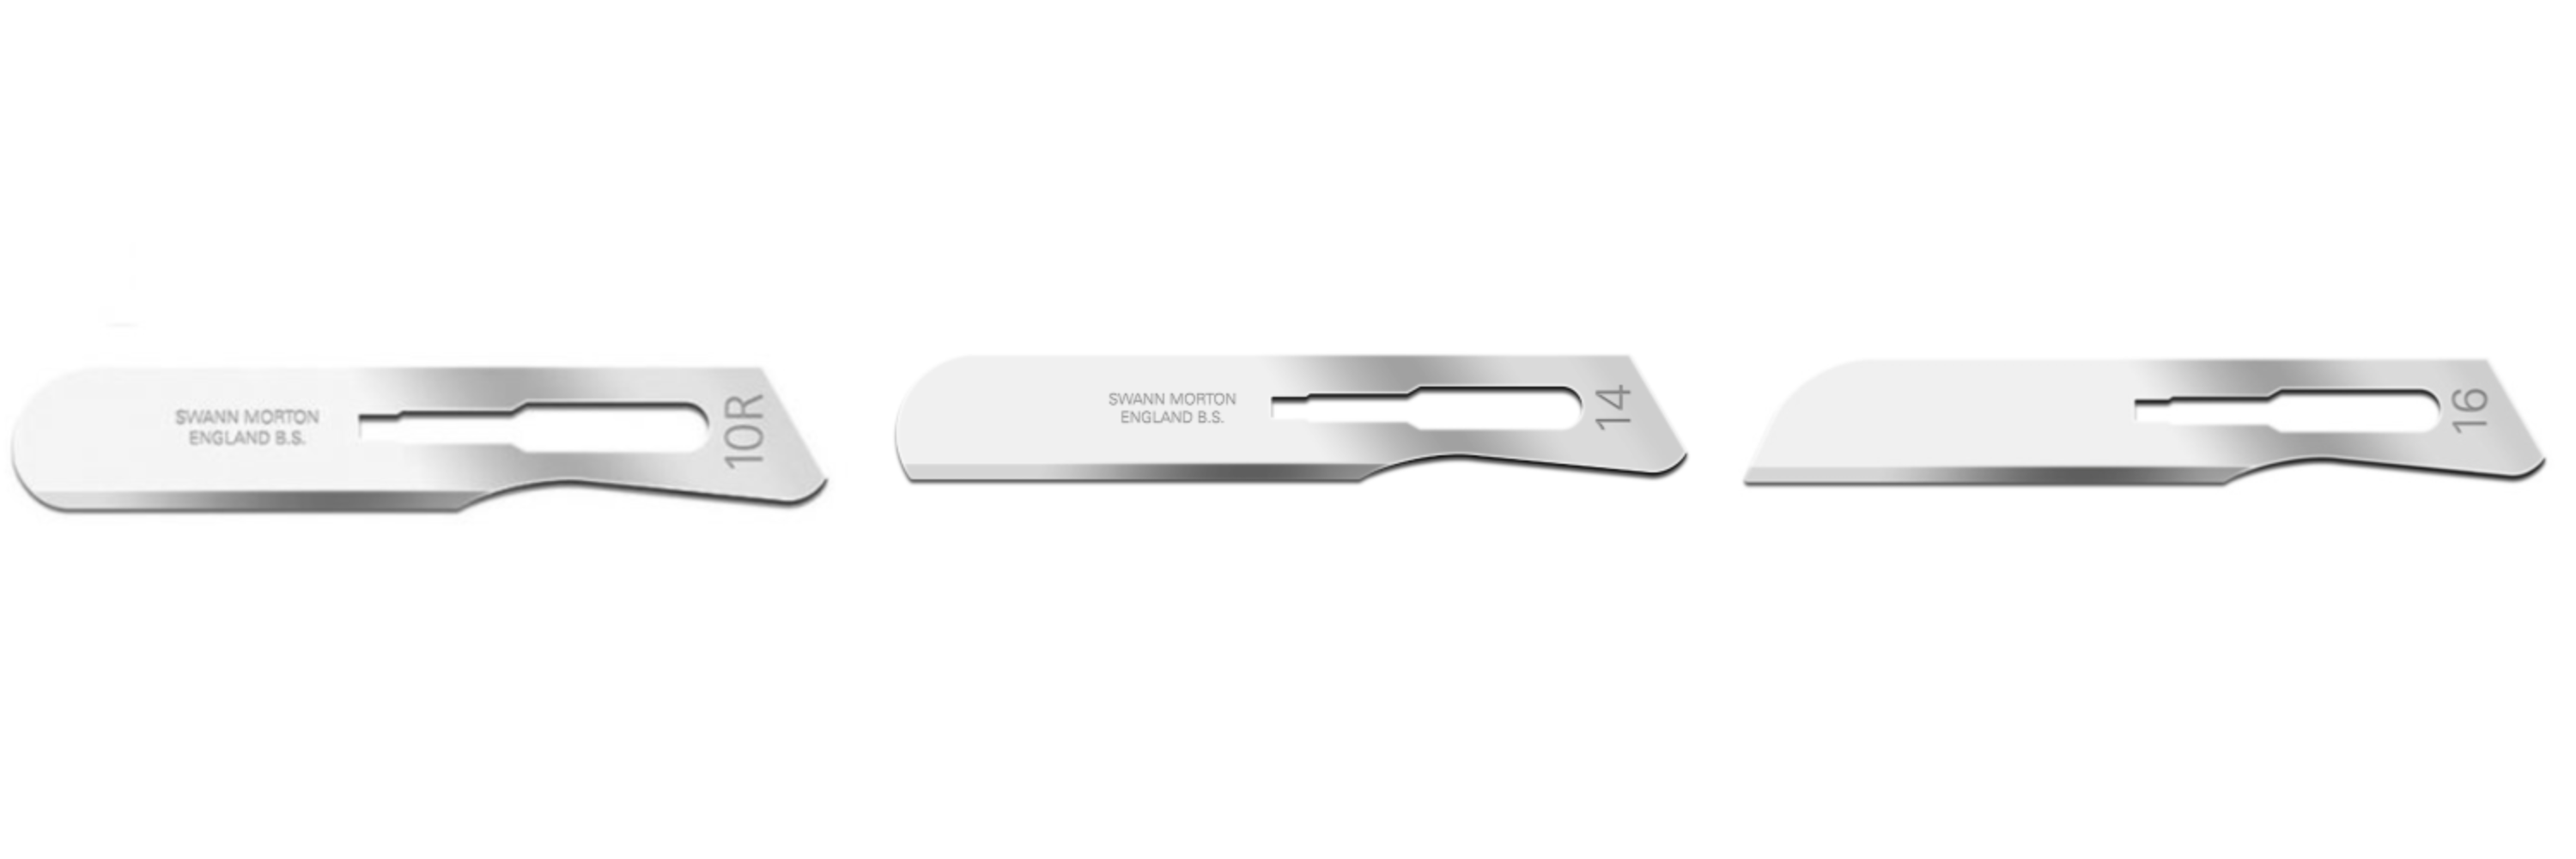
In this comprehensive guide, you'll learn about the three primary dermaplaning blade sizes (10R, 14, and 16), understand the differences between stainless steel and carbon steel options, discover when sterile blades are essential, and receive recommendations for choosing the perfect blade based on your experience level and treatment needs.
Understanding Blade Sizes: The Basics
Dermaplaning blades are identified by numerical sizes that indicate their shape, curve profile, and cutting edge characteristics. The three most common sizes used for facial dermaplaning are 10R, 14, and 16. Each size offers distinct advantages for different facial areas, skin types, and practitioner preferences.
Size 10R: The Curved Specialist
Blade Shape: Features a distinctly curved cutting edge with a rounded belly and sharp point
Curve Profile: Deep, pronounced curve that follows facial contours naturally
Characteristics:
- Most versatile blade for dermaplaning applications
- Curved edge conforms to cheeks, jawline, and forehead easily
- Rounded shape reduces risk of accidentally catching skin
- Excellent control for both broad strokes and detailed work
- Popular choice among professional estheticians
Best For: All-purpose dermaplaning, beginners learning technique, treatments requiring precision around facial contours
Size 14: The Precision Tool
Blade Shape: Smaller, more pointed blade with a gentle curve
Curve Profile: Moderate curve, shorter cutting edge than 10R
Characteristics:
- Compact size provides exceptional control
- Sharp point allows detailed work in confined areas
- Shorter blade length reduces risk in delicate zones
- Ideal for precision work around nose, lips, and eyebrows
- Easier to maneuver in tight spaces
Best For: Detail work around nose and upper lip, treatments requiring precision control, practitioners with smaller hands
Size 16: The Straight Edge
Blade Shape: Nearly straight cutting edge with minimal curve
Curve Profile: Very slight curve, almost linear blade profile
Characteristics:
- Straight edge provides consistent contact across flat surfaces
- Efficient for covering larger facial areas quickly
- Predictable cutting action due to uniform blade angle
- Less forgiving on highly contoured areas
- Requires more experience to use effectively
Best For: Larger, flatter facial areas (cheeks, forehead), experienced practitioners comfortable with straight blades
Quick Comparison: Blade Sizes at a Glance
| Feature | Size 10R | Size 14 | Size 16 |
|---|---|---|---|
| Curve Profile | Pronounced curve | Moderate curve | Minimal curve |
| Blade Length | Medium | Short | Medium-Long |
| Best For | All-purpose, contours | Detail work, precision | Flat areas, speed |
| Skill Level | Beginner to Advanced | Intermediate to Advanced | Advanced |
| Control | Excellent | Exceptional | Good |
| Coverage Speed | Moderate | Slower (precision) | Faster (efficiency) |
Blade Material: Stainless Steel vs. Carbon Steel
The material composition of your dermaplaning blade affects its sharpness, durability, and maintenance requirements. Understanding the differences between stainless steel and carbon steel helps you select the optimal blade for your practice needs.
Stainless Steel Blades
Material Composition: Surgical-grade stainless steel alloy with chromium for corrosion resistance
Durability and Longevity:
- Maintains edge sharpness throughout single-use treatment
- Resistant to dulling from moisture or skin oils
- Consistent performance from first stroke to last
Corrosion Resistance:
- Excellent resistance to rust and oxidation
- Can be stored in normal humidity conditions
- No special storage requirements beyond sterility
Best For:
- Professional esthetic practices prioritizing consistency
- Humid climates or storage environments
- Practitioners wanting reliable, predictable performance
- All dermaplaning applications and client types
Available at Surgo: Sizes 10R, 14, and 16 in sterile individual packaging
Carbon Steel Blades
Material Composition: High-carbon steel without chromium, offering exceptional initial sharpness
Sharpness Characteristics:
- Extremely sharp cutting edge fresh from packaging
- Achieves very smooth, effortless glide initially
- Finest edge geometry for ultra-precise work
Usage Considerations:
- Must be used immediately upon opening
- Can oxidize if exposed to moisture
- Single-use only with no storage after opening
- Requires dry storage before use
Best For:
- Experienced practitioners who appreciate ultra-sharp blades
- Clients with very fine, light vellus hair
- Treatments requiring the absolute sharpest edge
- Practitioners in dry climates
Available at Surgo: Sizes 14 and 16 in non-sterile foil packs of 5
Which Material Should You Choose?
For most professional estheticians and at-home users, stainless steel blades offer the best balance of performance, reliability, and convenience. They provide excellent sharpness that lasts throughout the treatment without requiring special storage considerations or worrying about oxidation.
Carbon steel blades appeal to experienced practitioners who specifically value the exceptionally sharp initial edge and work in controlled environments where immediate use after opening is standard practice.
Sterile vs. Non-Sterile: What You Need to Know
Understanding sterility requirements ensures you're providing the safest possible dermaplaning treatments while managing costs effectively based on your specific application.
The Importance of Sterility in Dermaplaning
Dermaplaning involves a sharp blade making direct contact with skin, creating microscopic abrasions as it removes dead skin cells and vellus hair. While not typically penetrating deeply enough to draw blood, these micro-abrasions represent potential entry points for bacteria. Sterile blades eliminate this risk by ensuring the blade surface is completely free of microorganisms.
⚠️ When Sterile Blades Are Essential
Professional Use: If you're performing dermaplaning treatments in a clinical, spa, or salon setting, sterile blades are non-negotiable. Professional standards of care require eliminating infection risk, and most liability insurance policies mandate sterile single-use implements for skin treatments.
At-Home Safety: While some at-home users may be tempted to save money with non-sterile options, dermatologists strongly recommend sterile blades for facial dermaplaning regardless of setting. The minimal cost difference doesn't justify the infection risk.
Compromised Skin: Anyone with active breakouts, skin conditions, or compromised skin barrier should only use sterile blades to prevent introducing bacteria into vulnerable skin.
Cost Considerations: Non-Sterile Options
Surgo Surgical Supply offers carbon steel blades in non-sterile foil packs of 5 as a cost-effective option for specific applications where sterility is not required. These might include:
- Training and practice on mannequins or models (not live clients)
- Product demonstrations where blade doesn't contact skin
- Educational workshops teaching dermaplaning technique
Important: Non-sterile blades should never be used on client skin in professional settings or for actual dermaplaning treatments.
Proper Handling and Storage
Maintaining sterility requires proper handling from package to disposal:
- Storage: Keep sterile blades in original packaging in a cool, dry location away from moisture
- Opening: Open sterile packages only immediately before use; never open in advance
- Handling: Touch only the handle, never the blade edge, even before use
- Single-Use: Use each blade for one client only, then dispose immediately
- Disposal: Place used blades in approved sharps container, never in regular trash
Choosing the Right Blade for Your Needs
Your ideal blade selection depends on your experience level, treatment goals, and the specific needs of each client or treatment area. Here's guidance based on different user profiles.
For Professional Estheticians
Recommended Inventory: Stock multiple sizes to customize treatments for individual client needs
Client-Specific Recommendations:
- Clients with sensitive skin: Size 10R with gentle pressure provides control while minimizing irritation risk
- Clients with dense vellus hair: Fresh, sharp stainless steel 10R handles efficiently without tugging
- Male clients: Size 10R or 16 depending on facial structure; may require slightly firmer pressure
- Mature clients with thin skin: Size 14 for delicate areas; light pressure technique throughout
Versatility Considerations:
- Keep multiple blade sizes within arm's reach during treatments
- Document client preferences and responses for future appointments
- Consider using Size 14 for all detail work to develop consistent technique
- Some estheticians use only Size 10R for entire face after mastering control
Bulk Purchasing Benefits:
- Purchase boxes of 100 for best per-blade pricing
- Reduce packaging waste with bulk orders
- Ensure you never run out during busy treatment schedules
- Swann-Morton quality consistency across every blade
How to Match Blade to Treatment Area
Different facial areas present unique challenges that influence optimal blade selection. Understanding these nuances helps you achieve smooth, safe results across the entire face.
Larger Facial Areas: Cheeks and Forehead
Recommended Blade: Size 10R or 16
Technique Considerations:
- These relatively flat, broad surfaces allow longer strokes for efficiency
- Size 10R's curve still follows subtle contours while covering area effectively
- Size 16's straighter edge can be faster for very experienced practitioners
- Maintain consistent angle and pressure throughout each stroke
- Work in systematic patterns (e.g., top to bottom, outside to inside) for thorough coverage
Delicate Areas: Around Nose and Upper Lip
Recommended Blade: Size 14
Technique Considerations:
- These confined, contoured areas require precise blade control
- Size 14's compact dimensions prevent accidentally treating unintended areas
- Shorter blade length provides better visibility of treatment site
- Use very light pressure and short, controlled strokes
- Stretch skin taut with opposite hand for better blade contact
- Pay special attention to nostril curves and philtrum (area between nose and upper lip)
Jawline and Neck
Recommended Blade: Size 10R
Technique Considerations:
- Jawline curves require blade flexibility for proper contact
- Neck skin is more delicate and requires lighter pressure
- Size 10R's curve navigates under-jaw area effectively
- Have client tilt head to create flatter treatment surface
- Never dermaplane directly on throat/Adam's apple area
Around Eyes and Brow Bone
Recommended Approach: Size 14 with extreme caution, or avoid entirely
Safety Considerations:
- Many professionals avoid dermaplaning very close to eyes due to safety concerns
- If treating brow bone area, use Size 14 with very light touch
- Never treat upper eyelids or directly under eyes
- Maintain safe distance from eye area to prevent accidental contact
Skin Type and Sensitivity Matching
Sensitive or Thin Skin:
- Size 10R or 14 provide better control for gentle treatment
- Use feather-light pressure and fewer overlapping strokes
- Consider spacing treatments further apart (6-8 weeks vs. 4 weeks)
Normal to Thick Skin:
- Any blade size appropriate based on facial area
- Can use slightly firmer pressure for efficient removal
- May tolerate more frequent treatments (every 3-4 weeks)
Oily or Acne-Prone Skin:
- Avoid dermaplaning over active breakouts entirely
- Can treat unaffected areas with standard technique
- Sterile blades absolutely essential to prevent bacteria spread
Safety and Best Practices
Critical Safety Guidelines
Single-Use Importance:
Never, under any circumstances, reuse a dermaplaning blade—even on the same person. Blades dull quickly, and microscopic tissue and bacteria accumulate on the cutting edge during treatment. Reusing blades increases infection risk, causes skin irritation from dull edges, and can lead to uneven results.
Proper Blade Disposal:
- Immediately place used blades in approved sharps container
- Never attempt to resheathe or cap used blades (needlestick injury risk)
- Keep sharps container within easy reach during treatments
- Replace sharps containers when three-quarters full
- Follow local regulations for sharps disposal
Angle and Pressure Guidelines:
- Optimal Angle: Hold blade at 45-degree angle to skin surface
- Too Steep (90 degrees): Can scrape or nick skin
- Too Shallow (0-30 degrees): Won't effectively remove hair and dead skin
- Pressure: Use light, feather-like pressure—let blade sharpness do the work
- Stroke Direction: Always stroke downward in direction of hair growth
When to Replace Blades:
- Replace after completing one full face (never attempt second face with same blade)
- Replace immediately if blade catches or tugs on skin during treatment
COMPARE ITEMS

Quick View
{{product.item_name}}
{{attribute.value}}
{{attribute.value}}
{{{product.item_description}}}
- {{selling_point}}
| Location | Stock | |
|---|---|---|
| {{location.warehouse}} | {{location.quantity}} |
{{product.item_name}}
{{{product.item_description}}}
{{attribute.value}}
{{attribute.value}}
{{{product.item_description}}}
- {{selling_point}}
Configure your product
{{product.item_name}}
{{{ product.item_description }}}
Item Code: {{product.item_sku || ''}}